Thursday, January 13, 2011

Roadblocks

I spent some Christmas money on an obviously named "Rootooth" (A Bluetooth interface for the Roomba) from RoombaDevTools.com, only to be frustrated by a lack of documentation (and, admittedly, knowledge on my part).  The Rootooth works to a point - the point at which you pair it with your other Bluetooth device (Tried with my Desktop computer and DroidX).  The various documentation states that the passkey for pairing is "default", but may also be "1234" or "0000".  So far, in repeated trials, none work.  I am now trying lottery numbers and birthdays.  Arrrgh.

I did forgo setting up a hardwired serial connection in the interest of expediency.  Mini DIN 8/7 pin cables are slightly difficult to find (the Apple store has them, but wants $25-30.00 for them!!!  CompUSA has them for $2.00 each).  I am waiting on my shipment from CompUSA.  And so waits the serial connection troubleshooting that they will allow.  Arrrgh.

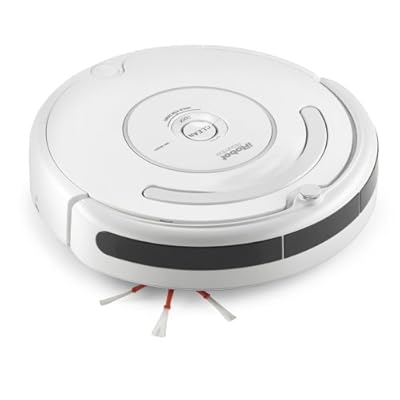
Also come to light is that the 500 series Roombas implement a different (expanded?) version of the Roomba Open Interface (ROI, formerly Serial Communication Interface - SCI).  Which implies that the 400 series Roomba (Fun Gus) I have been trying to interface with the Rootooth may utilize a retarded version of the ROI.  Much of what has been written about "Hacking Roomba" is several years old, and iRobot seems to have abandoned online support of the ROI for consumer Roomba (Roombas?  Roombi?), in lieu of pushing the experimenter / hacker to the Roomba Create.  Arrrgh.

As I have mentioned, my Roomba 530 (Dirty Gertie) is smarter and faster, while my Romba 400 (Fun Gus) is more brutish in its approach.  Even though Gus sports an IR detector on the top of his bumper like all Roomba, he seemingly ignores Virtual Walls and gets stuck in a couple of spots around the house.  As to the Rootooth, it receives power when plugged in, but I am not confident that the serial connection is patent.  Where are those serial cables?  Arrrgh.

2010-12-16_23-01-12_898I haven't touched the Schlembot in a few days.  There is some glitch in the "TurnCounterClockWise" routine that interfaces with the Pololu serial motor controller.  Maybe some time and distance will provide clarity when next I bang on it.   Arrrgh.

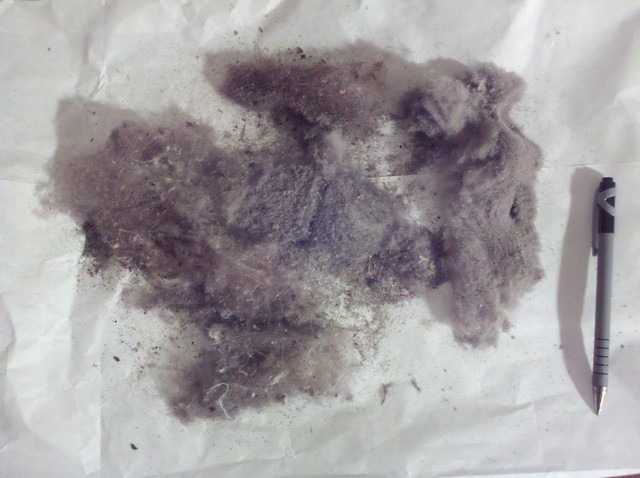
But, as I type this, Gertie and Gus are dervishing on the floor, sucking and sweeping up the detritis of our domesticity, doing what they were (primarily) designed to do, and doing it well.  And that pleases me.

Friday, January 7, 2011

iRobot Looj

Not as charmingly named as the Roomba, Looj is iRobot's gutter cleaning robot.  Like the robot vacuum cleaner, I think this is another perfect application for technology. I say this as a man with a gutter problem to solve. 

The Looj comes with a battery-powered remote (2 x AAA), a 7.2V NiCad battery pack (very robust), with wall charger, and a sweeper / "auger" assembly. 

All wear items are replaceable. 

Reportedly very good at cleaning gutters.

Looj is NOT autonomous.  Must be controlled by a human with the remote.  As I write this, I am charging the batteries.  Performance report to follow. 

Saturday, January 1, 2011

Schlembot Motor Test and Excellent Power Supply

After weeks of fiddling around with building a VEX-based drive system for the robot, its power supply, Pololu interface, the servo and the case for the Ping)))  module, and just generally thinking about the Schlembot (not to mention The Holidays, and 417duino prototyping)...  it's time to write some Arduino code and make some shit happen.  This is a basic forward / backwards loop, just to monkey with motor speed and equalization.  It seems the right motor has a little more torque for some reason and kicks the whole robot to the left when going forward or reverse.  I think I can compensate for that by increasing the left motor speed by a tiny bit.  The servo wants to jerk around a little bit from line noise in the 5V power supply, so I put in some purposeful code to make the servo scan left-center-right.  The Ping module in the rotating project case isn't doing anything useful at the moment, just going along for a ride. 


I used my DroidX camcorder app to take this video - it's like 49MB in size. Crazy.

Below is the latest incarnation of the Schlaboratory Power Supply, incorporating Pololu motor control on the good old Radio Shack 276-150 PCB. 417, natch. I used this power supply with my lego / Basic Stamp robots and it performed very well. It has integral ports for powering servo motors and supplying a logic control signal. Vin could be anything between 7 and 20 (some say 35) volts.  I'm using a six-pack of 1.5V C cells to provide a nominal 9V.  9V out to Arduino module (which has its own on-board voltage regulator), the 5V from this power supply is for Pololu logic power, servos, and the breadboard.  The 7805 voltage regulator wastes the excess voltage as heat, but is simpler to implement than a switching regulator.  Good enough compromise for my nefarious purposes. 

Power supply  and pololu schematic

Happy New Year!

Here's hoping that the future smiles on you and that the forces of entropy and chaos do not factor into your reality.  On that note, here's a photo of the crap that the Roombas vac'ed up today.  I know, effing gross, and that's after about ten vacuumings of the house.  The Roombas just keep working. 

So, if you wonder if the Roomba actually works, look at this pile of crap and know it's true. 

Coming soon - bluetooth and Arduino-compatible control modules, bending the Roomba to the will of Schlaboratory.  Stay tuned.

Wednesday, December 29, 2010

The Future Is Now!


Recently, we (the Western World) had a wintertime holiday season (take your pick of celebrations and spiritual affiliations) that traditionally includes the exchanging of gifts.  Which presents a bit of a challenge during that gift, buying / wrapping / giving time of the year.   We (Lisa and I), being the combination of two adult households, squeezed into half a house (900 feet ^2), have few unmet needs and even less room for non-essentials.  Which means, for instance, no more furniture or superfluous kitchen appliances.

One morning, at the fire station, I was leafing through newspaper advertisement inserts (which I RARELY do), thinking about the gift dilemma, when destiny brought me to a page in the Target flyer.  "Buy one, get two Roombas." Cue parting clouds, shaft of heavenly light, and choir of angels (or whatever - it's just a metaphor). 

I've been thinking about getting a robot vacuum cleaner ever since I first heard about the Roomba.  On one hand, my wife, Lisa, is a practical lass, and it's hard to sell her on gratuitous technology.  I had to exert considerable charm to get a microwave in the kitchen (but now it's indispensable).  But, on the other hand, what a perfect application for the domestic robot: a mindless dirty task.  A robot doesn't get bored, have anything better to do, or argue.  How can a gift that promises to clean the house and actually do the work not be appreciated?  And I'd get two, one to use, and one to hack. 

The Target offer was for a Roomba model 530 and model 400  for $299.99, a pretty good deal.  What really excited me was that the maker of Roomba, iRobot, has made their robots hacker-friendly by exposing functionality via a serial port.  The Roomba Open Interface provides access to the Roomba's sensor's and actuators through a serial communication protocol. A computer can be used to control the Roomba, either with a mini-din 7 cable tether, or wirelessly, using Bluetooth.  I intend to build an interface cable to connect a 417duino to the Roomba serial port, and exert control over function and scheduling, the 417roombino.
The 530 came with a charging station (a "dock") and a couple of virtual walls that could be used to keep the robot out of certain areas, or away from potential hazards.  A spare filter and cleaning tool for the spinning brush bar was included as well.  The 400 came with a plug-in charger (but there are docking station contacts on the bottom of the robot), three spare filters, and a different cleaning tool. Both robots have removable debris bins at the rear, where large particles are swept into one box, and finer particles are vacuumed into another (filtered) box.  Notably, the manual stresses the importance of cleaning and maintenance, and complete replacement parts are available from iRobot and other vendors.

How do they clean?  They suck.  No, really, they suck, and brush, and bump, and spin, and dance under and around the furniture, and into the corners, and all the little nooks and crannies.  We try to keep a clean house, but the acquisition of a Scottish Terrier last year has compromised that goal.  The first time we ran the 530, we stopped it half way through the cleaning cycle and checked the dirt bin.  We were shocked to find a thick mat of felted dog (and human) hair in the sweeper bin, and another mat of dirt, dust, and hair in the vacuum bin.  We cleaned out similar masses of debris twice more that night.  We've used the robots to vacuum seven or eight times so far, and we have had similar results every time.  The rotating brushes and sweepers get wrapped in hair and grunge, making the cleaning tools absolutely necessary.  I intend to take very good care of my robots and use them for a long time.

The differences between  the two robots are significant.  The 530 ("Dirty Gertie") is smarter in how it navigates a crowded room, slowing down as it approaches an obstacle, only nudging it gently to confirm its existence.  The 400 ("Fun Gus") just bumps into everything full speed ahead.  Gertie is quieter and seems to finesse around carpets and loose objects on the floor with more grace, while Gus occasionally gets under the rug or stuck beneath furniture.  Gertie also seems to have a little more smarts when it comes to navigating farther afield, only to find her way back to the docking station when her battery runs low.  Gus is slower to find his way out of a room, and just stops when his battery is flat with a musical "Uh-Oh".  They definitely have personalities, in the same way that new pets unfold once you bring them home.  I look forward to working and playing with them in the future. 

Dirty Gertie bumbling about the multipurpose room.

Tuesday, December 28, 2010

417duino Schematics

The 417duino Arduino-compatible is intended to be assembled from off-the-shelf components, in a variety of configurations for maximum versatility and economy.

0001 minimus
Rock-bottom basic support for a pre-programmed ATmega328 microcontroller, for use with appropriate regulated power supply.  Intended for least-expensive embedded applications.  Options: Indicating LEDs, Reset switch, headers for I/O pins (soldered connections recommended for embedded applications).


0010 medius
On-board regulated 5V power supply for pre-programmed ATmega328 microcontroller.  Intended for  embedded applications. Options: Indicating LEDs, Reset switch, headers for I/O pins (soldered connections recommended for embedded applications).


0011 magnus
On-board regulated 5V power supply, FDTI USB-Serial programming interface, Reset switch, Indicating LEDs, headers for I/O pins .  Intended for rapid prototyping, educational applications. 


0100 maximus
On-board regulated 5V power supply, FDTI USB-Serial programming interface, Reset switch, Indicating LEDs, headers for I/O pins .  Intended for rapid prototyping, educational applications, custom bootloader / ICSP programming and development. 

417duino Blinky Test


True, it's not very dynamic; it just blinks.  But it is a glorious proof of concept.  Green LED is power indicator (nominal 6V from 4 x 1.5 AA's), yellow attached to Arduino Pin13.

Using the USB BUB Board from Modern Device to reprogram the ATmega328 chip I bought from Sparkfun, I replaced an LED fader program with one that simply blinks at a constant rate.  Additionally, the 5V supply from the USB connection will power the board - must be careful not to have more than one power supply.  A SPDT switch on the power into the circuit solves this problem nicely.

This is a 417duino mashup - no on-board regulated power supply, but has the FTDI pin header, and Pin13 LED.  Initially, I assembled it with the wrong size capacitors on the crystal (22uF instead of 22pF - DOH! That's an order of magnitude error)  Didn't work -  big surprise.  Didn't brick it either, as evidenced by that beautiful blinking yellow LED.